Velo Air Inc Logo
IIRCR and NADCA logos

Certified Residential & Commercial Air Duct Cleaning Experts.

Lic # 1077553 C20 B C61/D64

CALL US!

Free Visual Inspections

Can Attic Insulation Make You Sick?

Can Attic Insulation Make You Sick?

Man Sneezing.

Can Attic Insulation Make You Sick?

When we think about attic insulation, we often consider its benefits: energy efficiency, comfort, and reduced utility bills. However, a question that might not immediately come to mind but is equally important is: Can attic insulation make you sick? It's crucial to understand the potential health impacts of the materials in our homes, especially something as pervasive as insulation. Let's dive into this topic to provide clarity and guidance.

 Understanding Insulation and Health

Insulation materials are designed to create a barrier that slows the transfer of heat in and out of your home. While modern insulation products are generally safe for use in residential spaces, there are conditions under which insulation could contribute to health issues.

Potential Hazards in Insulation

  • Older Insulation Materials: Some older types of insulation, particularly vermiculite insulation installed before 1990, can contain asbestos fibers, which, when inhaled, can cause lung diseases, including cancer.
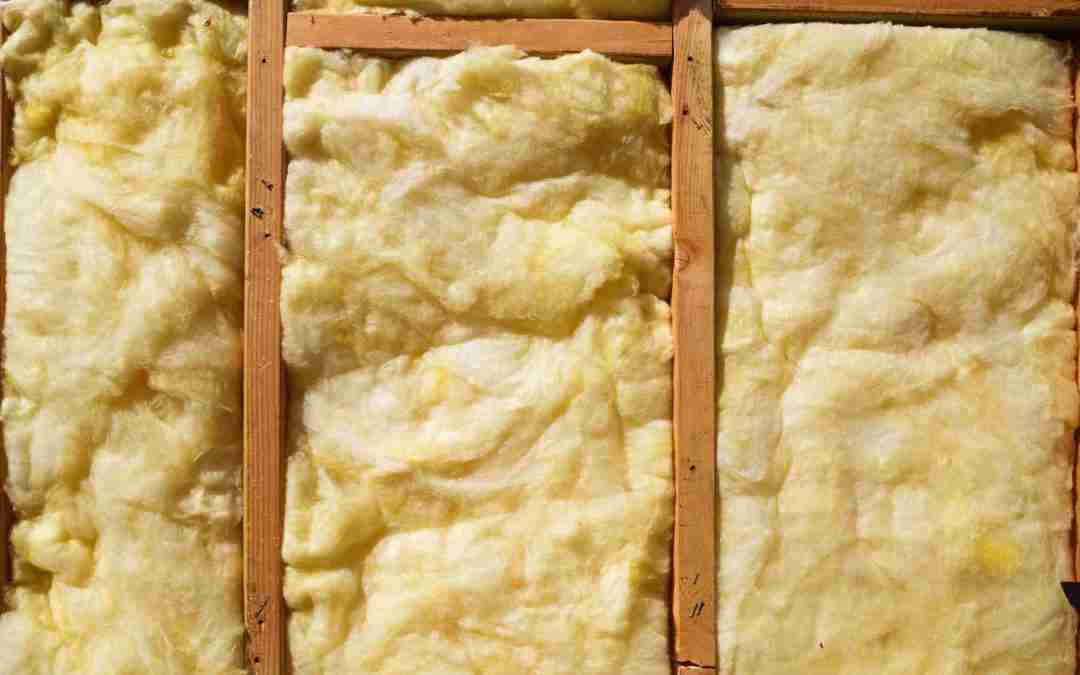
  • Fiberglass and Mineral Wool: These common insulation materials can irritate the skin, eyes, and respiratory system if their fibers become airborne and are inhaled or come into contact with the skin.
  • Chemical Off-Gassing: Certain foam insulation materials can off-gas volatile organic compounds (VOCs), especially when newly installed, potentially affecting indoor air quality and health.

Recognizing Symptoms

Exposure to harmful insulation materials can lead to a range of symptoms, including:

  • Respiratory Issues: Difficulty breathing, coughing, and wheezing may result from inhaling airborne insulation fibers or dust.
  • Skin Irritation: Contact with fiberglass insulation can cause itchiness, redness, and discomfort.
  • Eye Irritation: Fibers or dust can irritate the eyes, leading to redness and itching.
  • Chemical Sensitivity: Exposure to VOCs can cause headaches, dizziness, nausea, and aggravation of asthma or allergies.

Preventive Measures and Solutions

Proper Installation and Handling

  • Professional Installation: Ensure that insulation is installed correctly by qualified professionals who can minimize the release of fibers or dust.
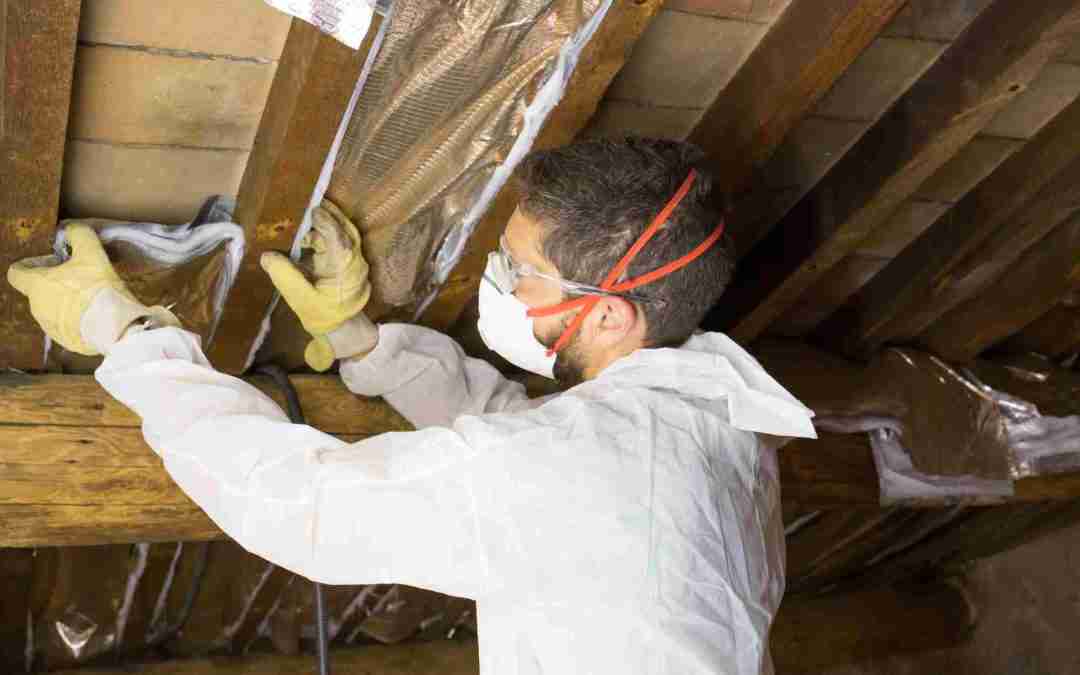
  • Protective Gear: During installation or any attic work, wear appropriate protective clothing, gloves, masks, and goggles.

Choosing the Right Insulation

  • Research Safe Materials: Opt for insulation materials with lower VOC emissions and those less likely to release harmful fibers. For example, certain types of foam insulation have been developed with reduced off-gassing.
  • Consider Natural Options: Some natural insulation materials, such as sheep's wool or cellulose, may offer fewer health risks. However, it's essential to ensure they're treated to be fire and pest-resistant.

Maintaining Good Indoor Air Quality

  • Ventilation: Ensure your home, including the attic, is well-ventilated to mitigate the accumulation of any harmful substances.
  • Air Purification: Consider using air purifiers with HEPA filters to reduce indoor airborne particles.

Key Takeaways

  • While attic insulation is crucial for energy efficiency, certain types can pose health risks if not handled or installed correctly.
  • Symptoms of exposure to harmful insulation materials can range from respiratory issues to skin and eye irritation.
  • Taking preventive measures, such as professional installation, choosing safer materials, and maintaining good indoor air quality, can help mitigate these risks.

Conclusion

So, can attic insulation make you sick? Yes, in some cases, insulation materials can contribute to health issues. However, with informed choices and proper precautions, you can significantly reduce the risk and ensure your home remains a safe and comfortable environment. Always stay informed about the materials used in your home and take action to protect your indoor air quality.

Disclaimer

This blog post is intended for informational purposes only and should not be considered professional health or safety advice. If you suspect that your insulation may be causing health issues, it's crucial to consult with professionals for an assessment and potential replacement.


Concerned about your attic insulation and its impact on your health? Contact us today for more information and expert guidance on safe insulation practices and materials.
 Visit Our Posts

Previous Post

How To Remove Old Attic Insulation Guide

How To Remove Old Attic Insulation Guide

Man removing old insulation from attic ceiling.

How To Remove Old Attic Insulation: A Step-by-Step Guide


Many homeowners face the task of removing old attic insulation, whether due to aging material, contamination, or the desire for an upgrade. The question, How to remove old attic insulation? is crucial for maintaining a healthy, efficient home. This guide will walk you through the process, providing practical tips and essential considerations to ensure the job is done safely and effectively.


Understanding the Need for Removal

Old or damaged insulation can lead to a host of problems, from reduced energy efficiency to poor indoor air quality. Whether it's due to pests, moisture, or simply the passage of time, removing old insulation is the first step toward a better-insulated home.


Here Are The Steps On How To Remove Old Attic Insulation

Step 1: Safety First

Wear Protective Gear: Before starting, equip yourself with the right equipment for insulation removal: gloves, a dust mask or respirator, goggles, and protective clothing. Insulation materials, especially older ones, can be hazardous and contain irritants or dangerous substances like asbestos.


Step 2: Prepare the Area

Clear the Attic: Remove any stored items to provide clear access to the insulation. This step also prevents contamination of your belongings.

Secure the Space: Use plastic sheeting to seal off the attic entrance and any vents to prevent dust and debris from spreading to the rest of your home.


Step 3: Removal Methods

Manual Removal

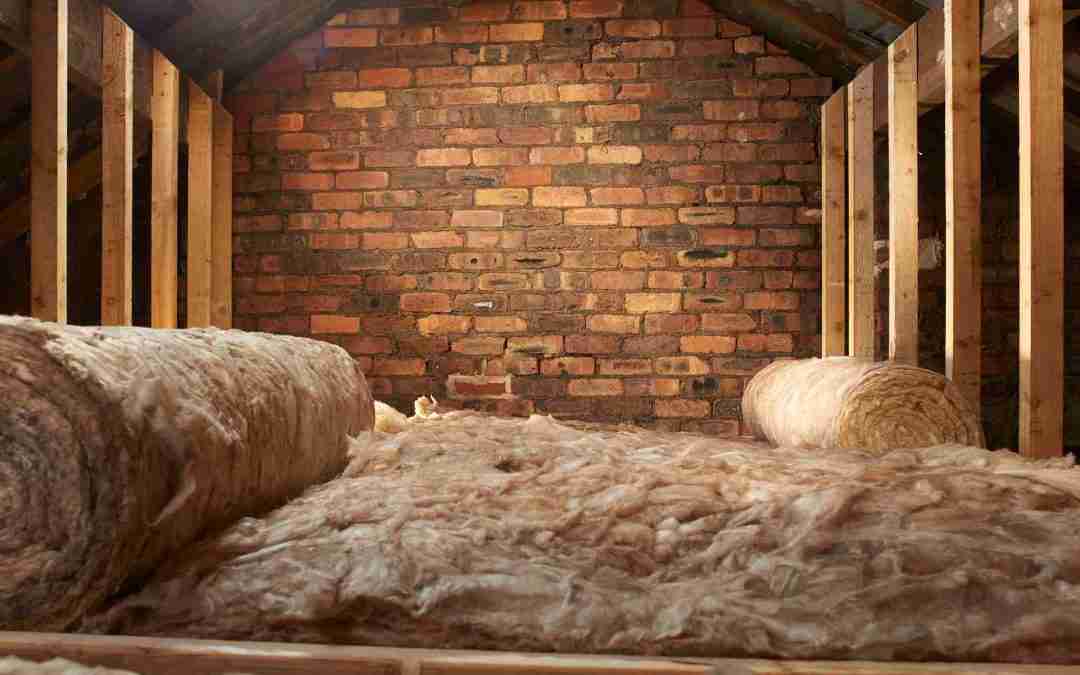
For batt insulation (the type that comes in rolls or sheets), you can roll it up and carefully place it in heavy-duty trash bags. Be gentle to avoid releasing particles into the air.

Vacuuming

Blown-in insulation requires a more powerful approach. Rent an industrial vacuum designed for insulation removal with a long hose that allows you to reach the attic from outside your home. This method reduces the risk of contaminating your living space.


Step 4: Disposal

Check Local Regulations: Insulation must be disposed of according to local regulations. Some areas require you to take it to a specific waste management facility.


Step 5: Clean Up

After removing all the old insulation, thoroughly vacuum the attic floor using a HEPA filter vacuum cleaner. This step ensures that any lingering dust or particles are eliminated.


Step 6: Inspection

Inspect for Damage: With the insulation removed, it's a great opportunity to inspect your attic for signs of damage, moisture, or pests. Addressing these issues now can prevent future problems.

Considerations for Professional Removal

While DIY removal is possible, there are situations where hiring a professional is advisable:

  • Asbestos: If your home was built before the 1980s, the insulation might contain asbestos. Disturbing asbestos without proper precautions can be hazardous. Always have a professional conduct an asbestos test before proceeding.
  • Pests or Mold: Professional removal companies are equipped to handle insulation contaminated by pests or mold safely.
  • Efficiency: Professionals have the tools and expertise to remove insulation quickly and efficiently, minimizing disruption to your home.


Key Takeaways

  • Safety is paramount. Always wear protective gear when handling old insulation.
  • Preparation is key. Clearing and securing the area prevents contamination of your living spaces.
  • Proper disposal of old insulation is essential and must comply with local regulations.
  • Consider professional help for hazardous materials contamination or to save time and ensure a thorough job.

Conclusion

Removing old attic insulation is a significant first step toward improving your home's energy efficiency and comfort. Whether you choose to tackle the project yourself or hire professionals, understanding how to remove old attic insulation equips you with the knowledge to ensure the job is done right.


Disclaimer

This blog post is intended for informational purposes only. Due to the potential risks involved with insulation removal, including exposure to hazardous materials, we strongly recommend consulting with or hiring a professional insulation removal company. They can assess your specific situation, perform safe removal, and advise on the best insulation materials for your home.


Looking to remove old attic insulation but not sure where to start? Call us today for expert advice and professional removal services tailored to your home's needs.

Can You Have Too Much Insulation In Your Attic?

Can You Have Too Much Insulation In Your Attic?

Insulation on wall.

Can You Have Too Much Insulation In Your Attic? Let's Find Out


When it comes to attic insulation, more often seems better. After all, insulation is pivotal in keeping your home warmth during the winter and coolness in the summer, lowering energy expenses, and improving overall comfort. But, poses the question: Can you have too much insulation in your attic? Yes, it is possible. Let's delve into this topic, unraveling the nuances of attic insulation and guiding you to make the best decision for your home.


Understanding Attic Insulation

Insulation works by capturing air within its framework, thereby limiting the movement of heat into and out of your residence. The performance of insulation is evaluated using R-values – a higher R-value indicates greater thermal resistance of the insulation.


The Concept of Diminishing Returns

The Balance Between Insulation and Ventilation

One key aspect of attic insulation is the principle of diminishing returns. Yes, adding insulation increases R-value, but only to a point. Beyond a certain thickness, the additional R-value gains are minimal compared to the cost and space utilized. Moreover, too much insulation can obstruct attic ventilation, leading to moisture problems and reducing the lifespan of roofing materials.

Moisture Control and Air Circulation

A well-insulated attic needs proper ventilation to prevent moisture accumulation. Moisture can cause mold growth and the decay of wood, compromising both your insulation and your home's structural integrity. Excessive insulation can block soffit vents, impeding the natural flow of air from the soffit to the ridge vent. This air flow is crucial for carrying moisture out of the attic.


Signs You Might Have Too Much Insulation

  • Blocked Vents: If soffit, gable, or ridge vents are covered or blocked by insulation, you're risking inadequate ventilation.
  • Moisture Issues: Signs of moisture, such as damp insulation, mold growth, or a musty smell, could indicate that excess insulation is hindering proper ventilation.
  • Unusual Temperature Variations: Difficulty in maintaining consistent temperatures throughout your home can sometimes be a consequence of over-insulation.

Finding the Right Balance

Assess Your Current Insulation

Evaluate the type and depth of your existing insulation. The U.S. Department of Energy provides regional recommendations for attic insulation R-values, considering local climate patterns. Ensure your insulation meets, but does not significantly exceed, these guidelines.

Consider the Type of Insulation

Different insulation materials have different R-values per inch. For example, spray foam insulation has a higher R-value per inch than fiberglass batts, meaning you can achieve the same thermal resistance with less material.

Professional Energy Audit

A professional energy audit can identify if you have an optimal amount of insulation. These audits often include a thermographic inspection, revealing heat leaks that insufficient or poorly installed insulation might cause.

Key Takeaways

  • While insulation is crucial for energy efficiency, there is a point at which more insulation does not equate to significant energy savings and can even cause problems.
  • Ensuring proper attic ventilation is as important as the insulation itself. The two need to work in tandem to prevent moisture-related issues.
  • A professional assessment can help determine the right amount and type of insulation for your attic, tailored to your home’s specific needs and the local climate.


Conclusion

 While well-intentioned, over-insulating can lead to ventilation issues, moisture accumulation, and ultimately, diminished returns on your investment. The goal is to achieve the perfect balance between insulation for energy efficiency and ventilation for air quality and moisture control. Consulting with insulation professionals can provide you with a tailored strategy that aligns with your home's specific requirements and regional recommendations.


Disclaimer

This blog post is for informational purposes only and should not be considered professional advice. Given the complexities involved in attic insulation and ventilation, we recommend consulting with a professional to assess your specific situation and needs.


Thinking your attic might be over-insulated, or simply unsure about your insulation needs? Call us today for a professional assessment and expert advice on achieving the ideal insulation balance for your home.

How To Insulate Ducts In The Attic?

How To Insulate Ducts In The Attic?

Insulated air duct in attic.

How To Insulate Ducts In The Attic: Enhancing Your Home's Efficiency


Ensuring your home remains comfortable and energy-efficient involves paying attention to not just the spaces you live in but also to the unseen areas that significantly impact your home's climate. One such critical aspect is the insulation of ducts in your attic. You might wonder, How to insulate ducts in the attic? Properly insulating your attic ductwork is vital for minimizing energy loss, maintaining consistent indoor temperatures, and reducing your energy bills. Let's explore the steps and considerations for effectively insulating your attic ducts.


The Importance of Duct Insulation

Ducts that pass through unconditioned spaces, like the attic, can lose a significant amount of the heated or cooled air they carry if they're not properly insulated. This loss not only leads to higher energy costs but can also strain your HVAC system, reduce its lifespan, and create inconsistencies in your home's comfort levels.


Step-by-Step Guide to Insulating Attic Ducts

  1. Inspect Your Ductwork

Before you begin, it's essential to inspect your ducts for any leaks, holes, or disconnections. Repairing these issues is crucial to ensure your insulation efforts are effective. Use mastic sealant or aluminum foil tape, make sure you do not use duct tape to seal leaks and secure connections.

  1. Choose the Right Insulation Material

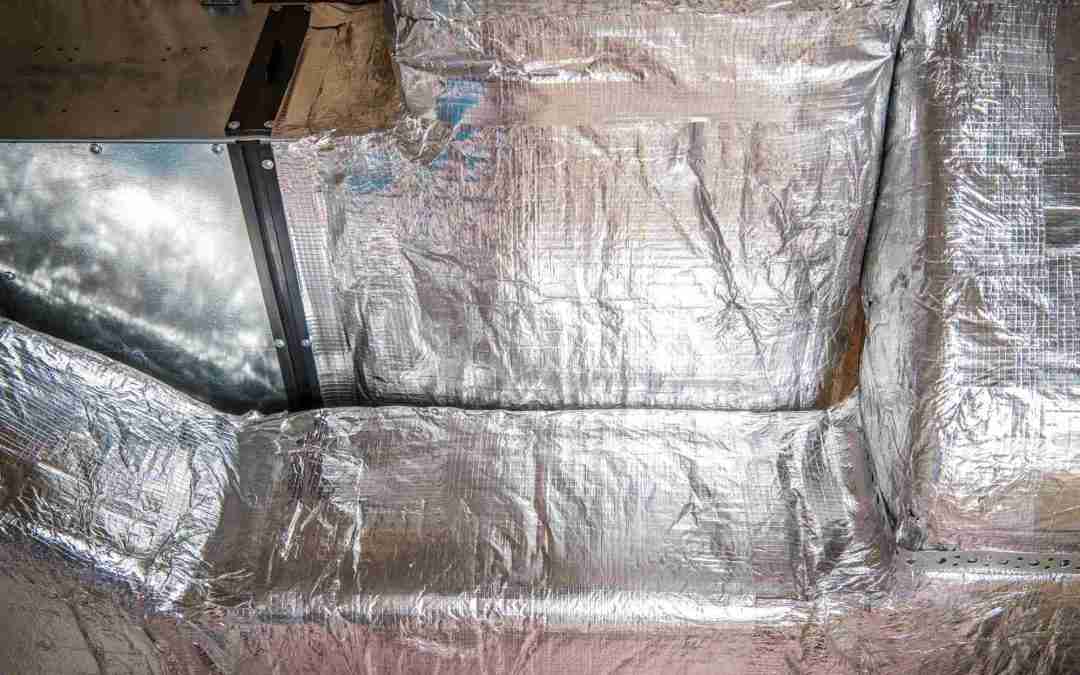
For attic ducts, it's recommended to use insulation with a high R-value, such as fiberglass duct insulation with a foil backing. The R-value you need may vary based on your climate, but in general, the higher, the better.

  1. Wrap the Ducts

Begin wrapping your ducts with the insulation material, making sure to cover them completely. The foil backing should face outward. Use the foil tape to seal the seams of the insulation wrap securely. Ensure that all ductwork, including joints and bends, is fully covered.

  1. Pay Special Attention to Connections

Joints and connections are areas where air leakage is most likely to occur. Make sure these areas are well-sealed and fully insulated. It may be helpful to apply an extra layer of insulation wrap or sealant in these critical spots.

  1. Ensure Proper Ventilation

While insulating, be mindful not to block any vents or airflow pathways in the attic. Ensuring adequate ventilation is specially important for preventing the accumulation of moisture and preserving the quality of air.


Key Considerations

  • Air Sealing: Before insulating, ensure all ductwork is properly sealed. This step is as crucial as the insulation itself for energy efficiency.
  • Professional Help: Consider hiring a professional for a comprehensive inspection and installation, especially if your ductwork is extensively damaged or if you're unsure about the correct materials and methods.
  • Maintenance: Make it a habit to inspect the insulation around your ducts for any indications of deterioration or harm, and confirm that your attic is properly ventilated to avoid problems with moisture.


Key Takeaways

  • Insulating attic ducts is essential for maintaining an energy-efficient home.
  • Proper inspection and repair of ductwork should precede insulation.
  • Use high R-value insulation materials and ensure complete coverage of the ducts.
  • Hiring the services of an expert guarantees that the task is executed properly and with efficiency.


Conclusion

Properly insulating your attic ducts is a crucial step towards enhancing your home's energy efficiency and comfort. By following the steps outlined above, you can reduce energy loss, lower your utility bills, and create a more consistent indoor environment. Remember, while DIY projects can be rewarding, there's no substitute for professional expertise, especially when it comes to complex home improvement tasks like insulating attic ducts.


Disclaimer

This blog post is intended for informational purposes only. Due to the complexities and potential risks involved in insulating attic ducts, we strongly recommend consulting with or hiring a professional insulation contractor to ensure the job is done safely and effectively.


Interested in improving your attic duct insulation but unsure where to start? Call us today for more information and expert guidance tailored to your home's specific needs.

How To Insulate A Roof Without An Attic?

How To Insulate A Roof Without An Attic?

Modern home with a flat roof.

How To Insulate A Roof Without An Attic?


Insulating a roof without an attic space is a unique challenge many homeowners face, especially those with vaulted ceilings, flat roofs, or homes designed without traditional attic spaces. The question is, how do you insulate a roof without an attic? It is vital for maintaining energy efficiency and comfort in your home. Let's explore effective strategies and considerations to ensure your roof is well-insulated, enhancing your living environment and potentially reducing energy costs.

Understanding the Importance of Proper Insulation

Before diving into the "how," it's crucial to understand the "why." Proper insulation:

  • Reduces energy bills by maintaining indoor temperatures, requiring less heating and cooling.
  • Improves comfort by eliminating drafts and hot or cold spots.
  • Prevents moisture issues that can lead to mold, mildew, and structural damage.

Strategies for Insulating Roofs Without Attics

  • Rigid Foam Insulation

Rigid foam insulation is a popular choice for insulating roofs without attic spaces. It offers high R-values per inch, making it effective for maintaining temperature control in limited spaces.

  • Installation: Rigid foam can be installed directly onto the roof sheathing or between the roof rafters. It's crucial to seal all joints and edges to prevent air leaks.
  • Spray Foam Insulation

Spray foam insulation provides excellent thermal resistance and air sealing in one step. It's particularly effective for irregular spaces or where other insulation types might be challenging to install.

  • Closed-cell spray foam is often recommended for exterior applications due to its higher R-value and moisture resistance.
  • Considerations: Professional installation is essential for safety and effectiveness. Ventilation must be carefully managed to prevent moisture accumulation.
  • Structural Insulated Panels (SIPs)

Structural insulated panels (SIPs) are pre-manufactured panels that combine insulation and structural elements, which are ideal for new construction or major renovations.

  • Benefits: SIPs offer superior insulation and airtightness, potentially reducing thermal bridging and improving energy efficiency.
  • Application: They can be used for roof construction, providing insulation as part of the roof structure itself.
  1. Reflective Insulation

For homes in warmer climates, reflective insulation or radiant barriers can be installed under the roof sheathing. This type of insulation reflects heat away from the home, helping to keep it cooler in the summer.

  • Effectiveness: While not as effective at retaining heat during winter, it can significantly reduce cooling costs in sunny regions.

Key Considerations

  • Ventilation: Proper ventilation is crucial to minimize or prevent moisture buildup and ensure the longevity of your roof and insulation. Consider ridge and soffit vents to promote air circulation.
  • Building Codes: Always consult local building codes to ensure compliance, especially regarding insulation materials and ventilation requirements.
  • Professional Assessment: Given the complexities of insulating a roof without an attic, consulting with insulation professionals is highly recommended. They can provide you with solutions tailored based on your home's design and local climate.

Key Takeaways

  • Insulating a roof without an attic space requires careful consideration of materials and techniques to ensure energy efficiency and comfort.
  • Options like rigid foam, spray foam, SIPs, and reflective insulation can be tailored to meet the needs of your specific home structure and climate.
  • Professional consultation and installation are crucial to navigating building codes and ventilation needs and ensuring the insulation is effective and long-lasting.

Conclusion

How to insulate a roof without an attic? It's a question that underscores the importance of innovative insulation solutions for unique home designs. Whether you're building a new home or retrofitting an existing structure, the right insulation strategy can significantly impact your home's energy efficiency and comfort. By understanding your options and working with professionals, you can ensure your roof is properly insulated, even without a traditional attic space.

Disclaimer

This blog post is intended for informational purposes only and does not constitute professional advice. Given the complexity of insulating roofs without attics, it's advisable to consult with experienced insulation professionals to assess your specific needs and ensure compliance with local building codes.


Looking for expert guidance on insulating your roof without an attic? Call us today for personalized advice and professional insulation services tailored to your home.

How Long Does Insulation Last In The Attic?

How Long Does Insulation Last In The Attic?

Insulation in the attic.

How Long Does Insulation Last In The Attic?


When considering home improvements, a crucial question many homeowners ask is, How long does insulation last in the attic? Understanding the lifespan of attic insulation is key to maintaining an energy-efficient home and ensuring your living space remains comfortable throughout the seasons. Let’s explore the factors that affect insulation longevity and when it might be time for a replacement.


The Lifespan of Attic Insulation

The durability of attic insulation can vary widely based on the material type, installation quality, and environmental conditions. On average, most attic insulation materials last anywhere from 20 to 80 years. However, this range is not set in stone, as factors such as moisture, pest infestations, and physical disturbances can shorten insulation's effective lifespan.

Types of Insulation and Their Lifespans

  • Fiberglass Insulation: One of the most common types with longer longetivity of attic insulation, fiberglass can last anywhere from 20 to 30 years or even longer when properly installed and maintained.
  • Cellulose Insulation: Made from post consumer recycled paper. Cellulose insulation is eco-friendly but may require replacement or supplementation after 15 to 20 years due to settling or moisture absorption.
  • Spray Foam Insulation: Known for its high R-value and moisture resistance, spray foam can last over 80 years, making it a durable option for attics.

Factors Affecting Insulation Longevity

  1. Moisture: Excessive moisture can degrade insulation materials, reducing their effectiveness and potentially leading to mold and mildew issues.
  2. Pests: Rodents and insects can damage insulation, compromising its insulative properties.
  3. Physical Disturbances: Renovations, wiring updates, and other attic work can physically disturb insulation, affecting its performance.
  4. Installation Quality: Poorly installed insulation may not reach its expected lifespan due to gaps, compression, or inadequate coverage.


Signs It’s Time for Replacement

  • Increased Energy Bills: A noticeable rise in heating or cooling costs can indicate your attic insulation is no longer effective.
  • Uneven Temperatures: In your home suggest inadequate or failing insulation.
  • Visible Damage: If your insulation is wet, compacted, or shows signs of pest activity, it’s time for a thorough inspection and possibly a replacement.


Key Takeaways

  • Longevity Varies: Insulation lifespan depends on the material, environment, and installation quality.
  • Regular Inspections: Conduct periodic attic inspections to identify potential issues before they compromise your insulation’s effectiveness.
  • Professional Assessment: If you suspect your insulation is underperforming, a professional evaluation can determine the best course of action.


Practical Tips for Homeowners

  • Stay Proactive: Keep an eye on your attic’s condition and address any leaks, pests, or other issues promptly to protect your insulation.
  • Consider an Upgrade: If the insulation in your home is approaching its anticipated lifespan limit, think about replacing it with a material that is either more resilient or offers better efficiency.
  • Seek Expert Advice: Consulting with insulation professionals can provide insights into the best solutions for your home’s specific needs.

Conclusion

How long does insulation last in the attic? While the answer varies, the importance of maintaining effective attic insulation cannot be overstated. It’s crucial for energy efficiency, comfort, and even the health of your home. By understanding the factors that influence insulation longevity and staying alert for signs of degradation, you can ensure your attic remains well-insulated for years to come.


Disclaimer

This blog post is for informational purposes only and does not constitute professional advice. The lifespan of attic insulation can vary based on numerous factors specific to each home. For a personalized assessment and recommendations, it’s best to consult with a professional attic insulation removal and replacement company.


Looking for expert advice on your attic insulation or think it might be time for a replacement? Call us today for more information and tailored solutions to meet your needs.

Should Attic Insulation Be Faced Or Unfaced?

Should Attic Insulation Be Faced Or Unfaced?

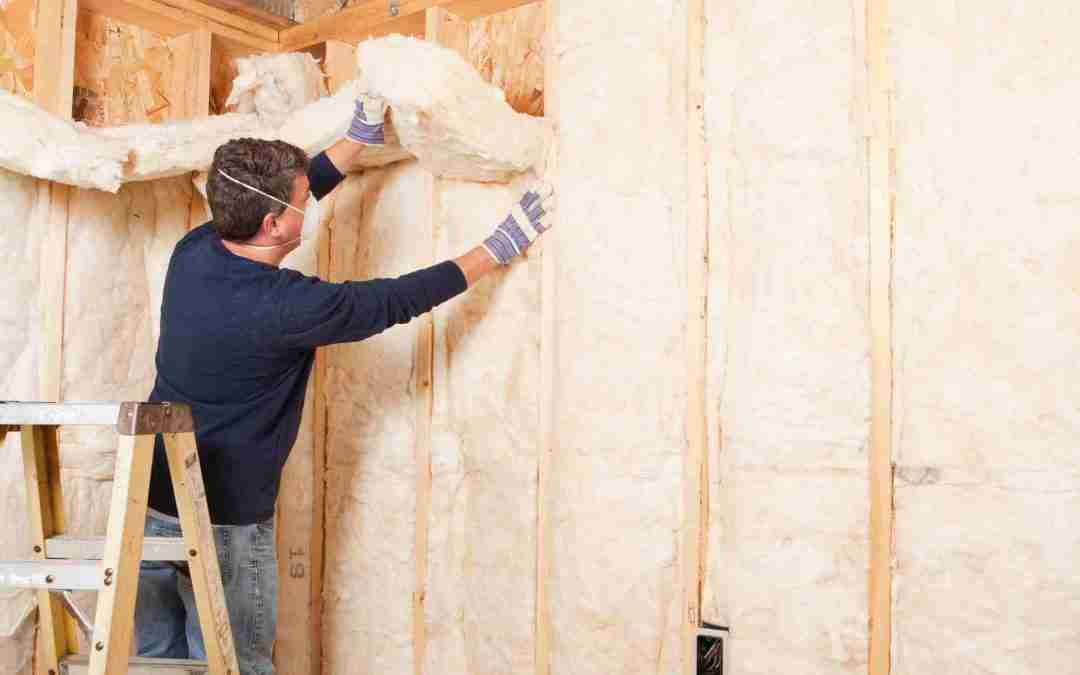
Man Installing Faced insulation in attic.

Should Attic Insulation Be Faced Or Unfaced?

In-home improvement and energy efficiency, one question often emerges: Should attic insulation be faced or unfaced? This query is more than just a matter of choice—it's about understanding the specific needs of your home and ensuring you make the right decision to enhance comfort, reduce energy bills, and prevent moisture-related issues. Let's dive into the differences between faced and unfaced Insulation, their applications, and which one might best fit your attic.


Understanding Faced and Unfaced Insulation

Faced Insulation is Insulation that has a vapor barrier attached. This vapor barrier is specifically designed to prevent moisture from passing through, protecting your home from the potential buildup of mold and mildew. It's typically used in areas where moisture control is a significant concern.

  • Benefits: Offers an added layer of protection against moisture.
  • Best For New installations where no vapor barrier exists or in climates with significant temperature fluctuations that can lead to condensation.

Unfaced Insulation, on the other hand, does not come with a vapor barrier. It's pure insulation material, making it an ideal choice for layering over existing Insulation without trapping moisture between the layers.

  • Benefits: Prevents moisture from being trapped within walls and ceilings, where is applied which can lead to mold growth.
  • Best For Adding Insulation on top of existing layers or in areas where moisture is not a primary concern.


Key Considerations for Choosing the Right Type

  1. Moisture Control: If you live in a humid climate or an area with large temperature swings, faced Insulation might be necessary for the base layer of your attic to prevent moisture ingress. However, it's crucial to ensure that you're not creating conditions for moisture to become trapped within your insulation layers.
  1. Adding to Existing Insulation: When you're supplementing existing Insulation, opt for unfaced Insulation. This approach helps avoid compromising the Insulation's effectiveness by preventing moisture from being trapped between layers.
  1. Local Building Codes: It's essential to consult local building codes before making a decision. Some regions have specific requirements regarding insulation types, including whether Insulation should be faced or unfaced.

Practical Tips for Homeowners

  • Consider Your Home's Existing Conditions: Evaluate the current state of your attic's insulation and moisture control measures. If you're unsure, consider consulting a professional for an assessment.
  • Don't Overlook Ventilation: Proper attic ventilation works hand in hand with Insulation to control moisture and temperature. Ensure your attic has enough ventilation to properly prevent common issues associated with poor insulation practices.
  • Professional Installation: While DIY projects can be tempting, professional installation ensures that your Insulation is installed correctly, maximizing its effectiveness and adhering to local building standards.


Key Takeaways

  • Choose Faced Insulation for new installations in moist climates or where an additional vapor barrier is beneficial.
  • Opt for Unfaced Insulation when adding to existing Insulation or in drier climates where moisture control is less of a concern.
  • Always Consider your specific situation, including climate, existing Insulation, and local building codes, before making a decision.

Conclusion

Deciding whether your attic insulation should be faced or unfaced depends on various factors, including your home's location, existing Insulation, and moisture control needs. While faced Insulation offers the advantage of moisture protection, unfaced Insulation is ideal for adding layers without trapping moisture. Ultimately, the right choice ensures your home remains comfortable, energy-efficient, and free from moisture-related problems.


Disclaimer

This blog post is intended for informational purposes only and does not constitute professional advice. Because every home's insulation needs are unique, we recommend consulting with a professional insulation contractor to assess your specific situation and make an informed decision.


Are you interested in learning more or need expert advice on choosing the right attic insulation for your home? Call us today for personalized guidance and professional insulation services.

How To Remove Blown Insulation From Attic?

How To Remove Blown Insulation From Attic?

Old blown in attic insulation.

How To Remove Blown Insulation From Attic?


Are you pondering how to remove blown insulation from the attic? Whether you're looking to upgrade your insulation, address pest infestations, or conduct a thorough clean-up, removing old blown insulation is a critical first step. Let's walk through the process, providing you with practical tips and insights to ensure the task is completed safely and effectively.


Understanding the Challenge

Blown insulation, commonly made from fiberglass or cellulose, offers excellent thermal resistance. However, over time, it can settle or become contaminated, diminishing its effectiveness and potentially harming your home's air quality. Removing this type of insulation requires careful planning and execution.

Safety First

Before diving into the removal process, it's crucial to prioritize your safety and that of anyone helping you.

  • Wear Protective Gear: If you are going to tackle this project on your own, either wear an Insulation Cover all Suit or, if not available, always wear a long-sleeved shirt, gloves, a high-quality dust mask or respirator, and safety goggles to protect against irritants.
  • Ensure Adequate Ventilation: Keep the attic well-ventilated to minimize dust and fiber circulation within your home.
  • Turn Off HVAC Systems: To prevent blowing the fibers and dust through your home, make sure your heating, ventilation, and or air conditioning systems are off during the removal process.

The Removal Process

  1. Clear the Area: Begin by removing any items stored in your attic. This clears the workspace and protects your belongings from dust and debris.
  2. Seal Off the Area: Use plastic sheeting to seal the attic entrance and any vents to prevent dust from blowing to the rest of your home.
  3. Use the Right Tools: A high-powered vacuum designed for insulation removal is your best bet. These are often available for rent at local hardware stores or equipment rental shops.
  4. Vacuum the Insulation: Carefully vacuum the old insulation, paying special attention to corners and hard-to-reach areas. For larger attics, working in sections can make the job more manageable.
  5. Dispose of the Insulation Properly: Collect the vacuumed insulation in heavy-duty bags designed for construction debris. Check with your local waste management company for proper disposal guidelines, as some types of insulation can be recycled.

When to Call Professionals

While many homeowners are tempted to tackle insulation removal as a DIY project, it's important to recognize when to call in the professionals. If your attic contains mold or pest infestations, or if you're unsure about the type of insulation or its condition, hiring a professional attic insulation removal company is the safest choice. These experts have the necessary equipment, knowledge, and experience to handle the job efficiently and safely.


Key Takeaways

  • Safety is paramount: Always wear proper protective gear and ensure the work area is well-ventilated.
  • Proper tools make a difference: Use a specialized vacuum for insulation removal to make the job easier and more effective.
  • Consider professional help: For challenging situations or to ensure the job is done right, professional services are worth the investment.


Conclusion

Removing blown insulation from your attic can seem daunting, but with the right preparation and tools, it's a task that can significantly benefit your home's energy efficiency and indoor air quality. Remember, this guide is a starting point. Depending on your attic's size, the amount of insulation, and any unforeseen challenges, you might find that calling a professional is the best course of action.

Disclaimer

This blog post is intended for informational purposes only. Removing attic insulation, especially blown insulation, can be hazardous and may require specific knowledge and equipment to ensure it's done safely and effectively. 

Always consider consulting with or hiring a professional attic insulation removal company to handle the job.

Interested in learning more about attic insulation removal or need professional assistance? Don't hesitate to call us today for more information and expert advice tailored to your needs.

What Is Attic Insulation Made Of?

What Is Attic Insulation Made Of?

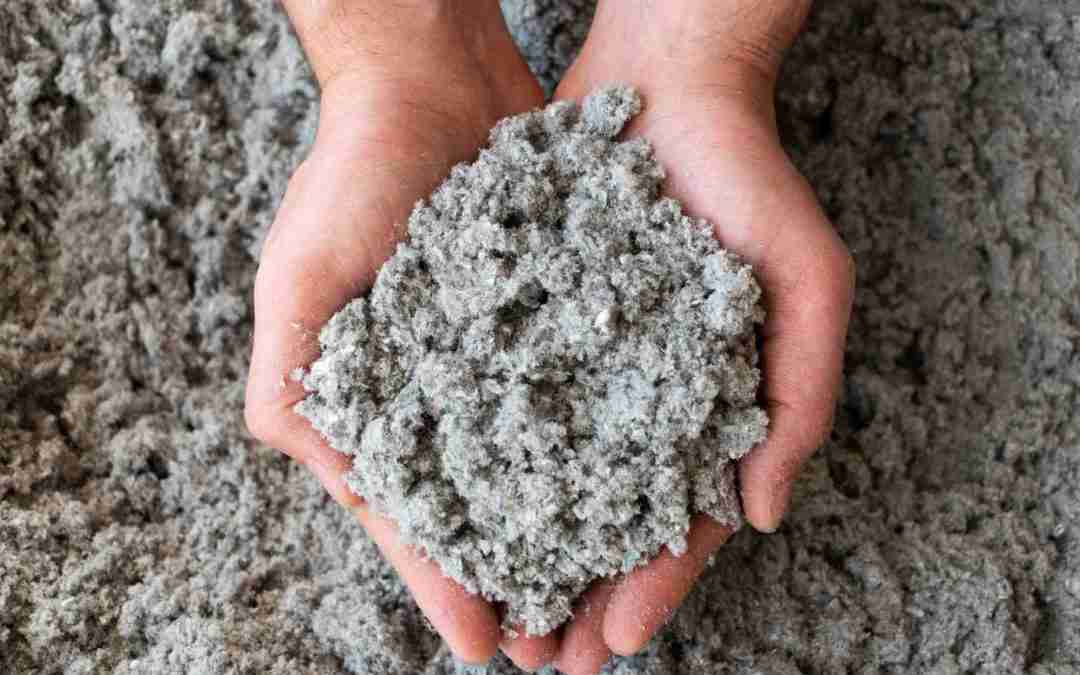
Two hands holding a pile of blown in attic insulation.

What Is Attic Insulation Made Of?


When it comes to keeping your home comfortable in the winter and summer, attic insulation plays a pivotal role. But have you ever wondered What attic insulation is made of? Let's shed some light on the various materials that keep your living space comfortable year-round.

The Role of Attic Insulation

Before diving into the materials, it's crucial to understand the importance of attic insulation. It acts as a barrier that minimizes the heat transfer between your home and the outside environment. The right insulation can lead to significant energy savings, improved indoor air quality, and a consistent temperature throughout your home.

Common Types of Attic Insulation

Fiberglass Insulation

Fiberglass is one of the most popular materials for attic insulation. Made from fine glass fibers, it's available in batts and rolls or as loose-fill. Fiberglass is favored for its fire resistance, affordability, and ease of installation. However, proper safety gear is required during installation to prevent irritation from the glass fibers.

Cellulose Insulation

Cellulose is an eco-friendly option made from recycled paper products, primarily newsprint. It's treated with fire retardants to enhance its safety. As loose-fill insulation, cellulose is excellent for filling in odd shapes and spaces in the attic, providing a high R-value per inch.

Spray Foam Insulation

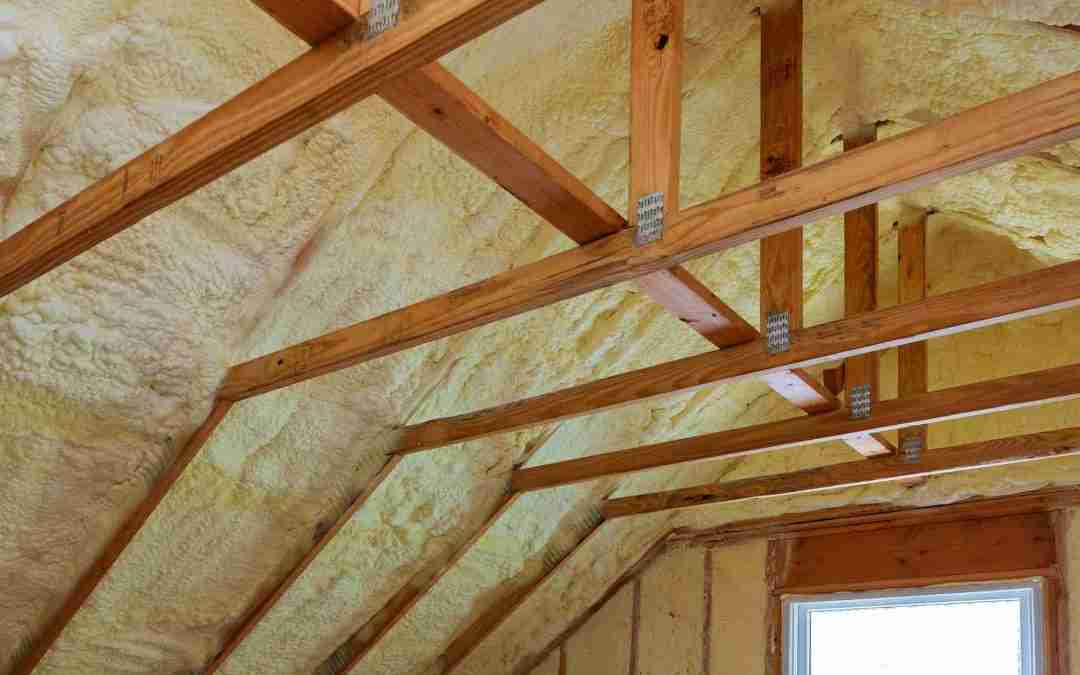
Spray foam is a liquid polyurethane that expands into a foam, creating a tight seal against air leaks. There are two types: open-cell and closed-cell, with closed-cell providing a higher R-value. Spray foam is ideal for sealing gaps, but it's more expensive than fiberglass and cellulose.

Mineral Wool Insulation

Mineral wool, known as rock wool and slag wool, is made from natural or synthetic fibers. It offers superior fire resistance and soundproofing capabilities. Mineral wool can be more expensive than fiberglass but is effective in areas requiring high-temperature insulation.

Radiant Barrier Insulation

Radiant barriers are reflective materials that reduce heat transfer from the roof to the attic space. While not traditional insulation, radiant barriers are particularly useful in hot climates to reflect the sun's heat away from the living space.

Key Takeaways for Homeowners:

  • Diverse Materials: Attic insulation comes in various materials, including fiberglass, cellulose, spray foam, mineral wool, and radiant barriers. Each has its advantages and applications.
  • Energy Efficiency: The right attic insulation can lead to significant energy savings by maintaining a consistent indoor temperature.
  • Professional Consultation Recommended: Given the variety of insulation types and their specific applications, consulting with a professional can help you make the best choice for your home.

Practical Tips for Choosing Attic Insulation

  1. Consider Your Climate: The ideal insulation for your attic depends on your local climate. For example, radiant barriers are more beneficial in warmer regions, while thick layers of fiberglass or cellulose might be better in colder climates.
  2. Understand R-Values: The effectiveness of insulation is measured by its R-value. Higher R-values indicate better insulation. Choose a material that meets the recommended R-value for your area.
  3. Evaluate Your Attic Space: The layout and accessibility of your attic can influence the type of insulation best suited for your home.
  4. Think About Long-Term Benefits: While some insulation types may be more expensive upfront, their durability and energy savings can offer greater benefits over time.

Conclusion

Understanding what attic insulation is made of and the different types available is the first step toward achieving an energy-efficient and comfortable home. Whether you're installing new insulation or replacing old material, it's important to choose the right type for your needs and climate. Don't hesitate to reach out to a professional attic insulation company for advice tailored to your specific situation.

Disclaimer: This blog post is for informational purposes only and is not intended as professional advice. The types of attic insulation mentioned are among the most common, but other materials are also available.

How Long Does It Take To Insulate An Attic?

How Long Does It Take To Insulate An Attic?

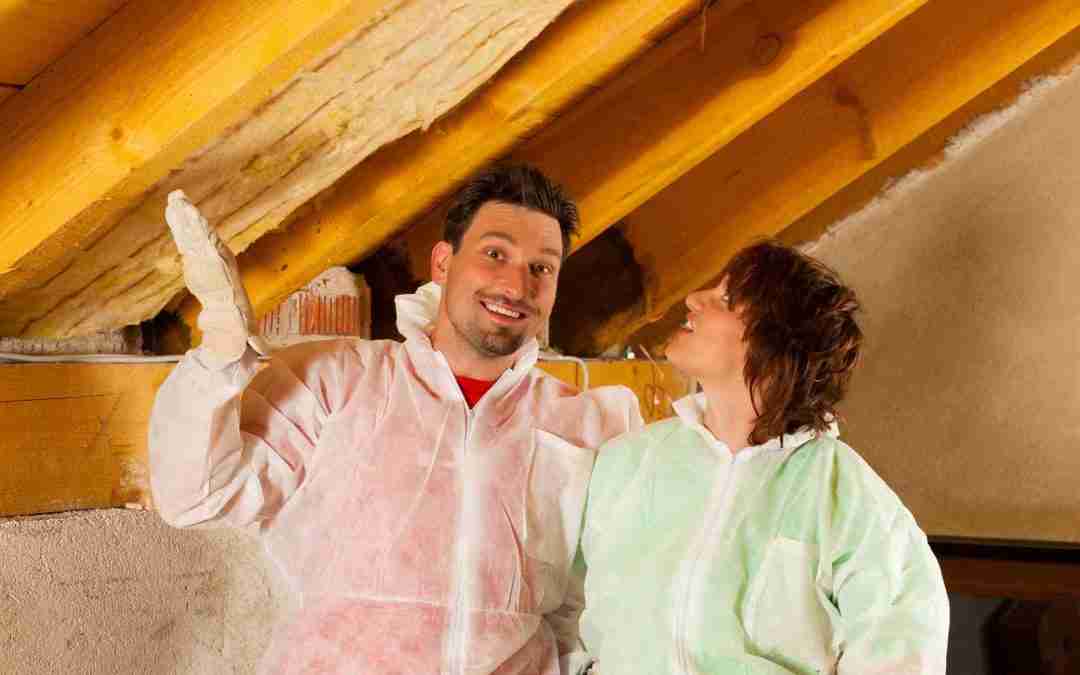
Couple installing Insulation in the attic.

How Long Does It Take To Insulate An Attic?


When it comes to improving your property's energy efficiency, attic insulation is a key step. But a question we often hear is, "How long does it take to insulate an attic?" On the average for the most common type of insulation the time it takes to insulate from our experience is from 4-8 hours. 

As your go-to attic insulation removal and replacement company, we're here to provide clarity and guidance on this topic.

Insulating an attic can be a quick and effective way to enhance your property's comfort and lower your energy bills. But, the duration of the attic installation project can vary based on several factors, including:

  •  The type of insulation you choose.
  • The size of your attic.
  • The condition of the existing insulation. 
  • And whether you encounter any unforeseen obstacles.

Let's explore these factors in more detail.

Factors Influencing Insulation Time

but can vary widely depending on several factors including the size of your attic, your experience level, and whether you encounter any unforeseen obstacles.

Type of Insulation

  • Batts and Rolls (Fiberglass or Mineral Wool): This material is pre-cut and can be rolled out to fit between joists and studs. It's relatively quick to install, with a professional team typically able to insulate an average-sized attic in 4 to 8 hours.
  • Loose-fill or Blown-In (Fiberglass or Cellulose): This requires specialized equipment to blow the material into place. The process can take a bit longer, generally around 6 to 10 hours for an average-sized attic.
  • Spray Foam: This method provides an air seal as well as insulation and requires precise application. Depending on the attic size and complexity, spray foam can take anywhere from 1 to 2 days.

Attic Size and Accessibility

The larger the attic, the longer the project will take. Accessibility issues, such as a low roof pitch or obstacles within the attic, can also increase the time needed to complete the insulation process.

Condition of Existing Insulation

If your attic already has insulation that needs to be removed, this will add to the project time. Removal and cleanup can take anywhere from a few hours to a full day, depending on the material and amount of insulation present.

Unforeseen obstacles

Several unforeseen obstacles could complicate the installation of insulation in an attic. These obstacles can affect the time needed to complete the insulation effectively. Here are some common challenges you might encounter:

  • Limited Access and Tight Spaces: Navigating materials and working in cramped areas can be challenging, slowing down the installation process.
  • Existing Insulation: Deciding whether to remove, add to, or replace existing insulation requires careful consideration and can impact the project's scope.
  • Wiring and Piping: Fitting insulation around electrical wires and plumbing without causing damage or reducing the insulation's effectiveness can be tricky.
  • Ventilation Issues: Ensuring that insulation does not block attic vents is crucial for preventing moisture buildup and related issues.
  • Roof Leaks or Water Damage: Any signs of leaks or previous water damage must be addressed before proceeding with new insulation to prevent future problems.
  • Structural Issues: Weak or damaged structural elements in the attic may need repair or reinforcement before insulation can be safely installed.
  • Insulation Material Handling: Dealing with fiberglass insulation requires protective gear to avoid irritation, which can be cumbersome in tight spaces.
  • Building Codes and Regulations: Meeting local building codes and insulation standards can introduce additional requirements and complications.
  • Pests and Rodents: The discovery of pests or rodent infestations in the attic requires immediate attention before new insulation can be placed.

Addressing these obstacles effectively often involves thorough planning and preparation, and in some cases, the expertise of a professional may be beneficial to ensure the installation is completed safely and up to standards.

Key Takeaways for Homeowners

  • The type of insulation, size of your attic, and condition of existing insulation are the primary factors that determine how long it will take to insulate an attic.
  • Professional installation can significantly reduce the time and hassle involved in insulating your attic.
  • Upgrading your attic insulation is an investment in your home's comfort and energy efficiency.

Practical Tips for a Smooth Insulation Project

  1. Choose the Right Material: Consider the pros and cons of different insulation types and select the one that best meets your needs and budget.
  2. Hire Professionals: Professional insulation contractors have the experience, tools, and knowledge to complete the job efficiently and safely.
  3. Prepare the Attic: Clearing the attic of personal belongings and addressing any repairs or air sealing needs beforehand can speed up the insulation process.
  4. Consider Timing: If you're planning other renovations or roof work, coordinating the insulation project around these can be more time and cost-effective.

Conclusion

The time it takes to insulate an attic can vary widely based on the factors discussed. However, with the right preparation and professional help, this valuable home improvement project can often be completed within a day or two, offering immediate benefits in comfort and energy savings.

Remember, every home is unique, and the best way to get an accurate estimate for your attic insulation project is to consult with a professional insulation contractor. They can provide personalized advice and detailed information based on the specifics of your home.

By understanding how long it takes to insulate an attic and preparing accordingly, you're taking a significant step towards enhancing your home's energy efficiency and comfort for years to come.

Disclaimer: This blog post is for informational purposes only and provides a general guideline based on typical experiences. The actual time required to insulate an attic may vary based on individual circumstances, the specific details of your home, and the complexity of the installation. For precise advice and estimates, we strongly recommend consulting with a professional insulation contractor who can assess your specific needs.

By taking proactive steps to insulate your attic, you are investing in the long-term comfort and energy efficiency of your home. Call us for a free visual quote.

Should You Insulate Attic Roof Rafters?

Should You Insulate Attic Roof Rafters?

Insulated attic with roof rafters exposed.

Should You Insulate Attic Roof Rafters? Is It Necessary?

When considering ways to enhance your home's energy efficiency, the question of attic insulation inevitably comes up. Specifically, homeowners often ponder, "Should you insulate attic roof rafters?" As an  attic insulation removal and replacement compay, we're here to guide you through the intricacies of insulating roof rafters and why it might be a beneficial decision for your home.

Understanding Attic Roof Rafter Insulation

Insulating attic roof rafters, also known as the sloped beams supporting the roof, is different from insulating the attic floor. This method involves placing insulation directly under the roof, which can significantly affect your home's temperature regulation and energy efficiency.

Why Consider Insulating Roof Rafters?

  • Enhanced Energy Efficiency: Proper insulation can help maintain a consistent indoor temperature, reducing the strain on your HVAC system and potentially lowering energy costs.
  • Increased Usable Space: If you're looking to convert your attic into a livable space, insulating the roof rafters is essential to make the area comfortable year-round.
  • Moisture Control: Insulating roof rafters may help prevent the buildup of moisture that potentially can lead to mold and mildew, protecting the structural integrity of your home.

Factors to Consider

Before deciding to insulate your attic roof rafters, consider the following:

  • Ventilation: Proper ventilation is a must to prevent moisture accumulation and ensure the effectiveness of the insulation. Make sure your insulation strategy includes adequate ventilation channels.
  • Type of Insulation: Various insulation materials are available, such as spray foam, batts, or rigid foam boards. Each has its advantages and specific installation requirements.
  • Building Codes: Comply with regional building codes and regulations, which may dictate specific requirements for insulating and ventilating your attic space.
  • Comply with regional construction standards and guidelines, which might specify particular criteria for the insulation and ventilation of your attic area.

Key Takeaways for Homeowners

  • Insulating attic roof rafters can offer significant benefits in terms of energy efficiency, comfort, and moisture control, especially if you plan to use the attic as a living space.
  • Consider ventilation needs carefully to prevent moisture issues, which can compromise both the insulation and the structure of your home.
  • Choose the right type of insulation for your needs, and be mindful of local building codes when planning your project.

Practical Tips for Roof Rafter Insulation

  1. Assess Your Needs: Consider how you plan to use the attic space and the climate in your area to determine if insulating the roof rafters is the best option for you.
  2. Consult a Professional: An insulation specialist can provide valuable advice if you actually need to or not insulate your rafters and if you do on the best insulation materials and methods for insulating your attic roof rafters, ensuring the job is done right.
  3. Factor in Cost: Insulating roof rafters can be more expensive than standard attic floor insulation due to the materials and labor involved. Ensure it fits within your budget and home improvement goals.
  4. Plan for Ventilation: Work with your contractor to design a ventilation strategy that complies with building codes and supports the effectiveness of your insulation.

Conclusion

Deciding to insulate attic roof rafters is a significant decision that can impact your home's energy efficiency and comfort. By considering the key factors and following practical advice, property owners can make an informed choice that aligns with their needs and budget. Remember, consulting with a professional can provide the insights and expertise necessary to ensure your attic insulation project is successful.

Disclaimer: This blog post is for informational purposes only and does not constitute professional advice. Insulating attic roof rafters involves specific considerations related to building codes, ventilation, and insulation types. It is highly advised that property owners consult with a professional insulation contractor to assess their specific situation and receive tailored recommendations.

By taking the time to understand the benefits and considerations of insulating your attic roof rafters, you can make a decision that enhances the comfort, energy efficiency, and value of your home for years to come.

Call us for a free visual assessment.

How Important Is Attic Insulation?

How Important Is Attic Insulation?

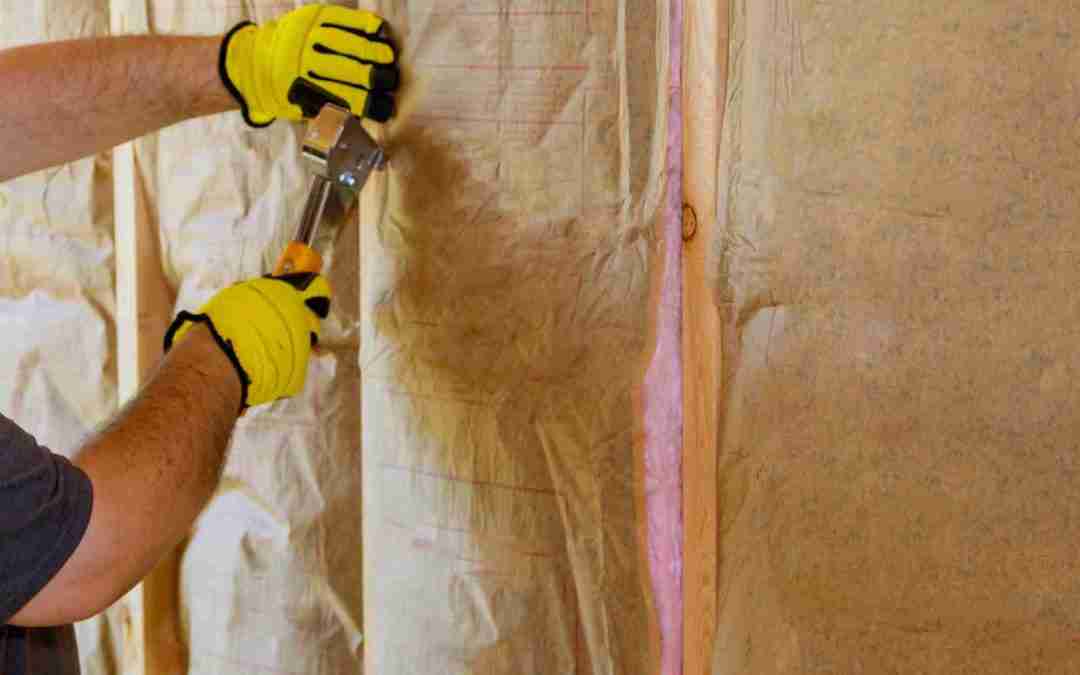
Man Installing Roll attic insulation.

How Important Is Attic Insulation? The Value of Attic Insulation in Your Home

In the quest for a more energy-efficient and comfortable home, one question often pops up: How important is attic insulation? You might be surprised to learn that the answer is: incredibly important. Not only does proper insulation help maintain your home's temperature year-round, but it can also significantly reduce energy bills of your property. Let's dive into why attic insulation is a critical investment for homeowners across the United States.

The Role of Attic Insulation

Energy Efficiency and Cost Savings

First and foremost, attic insulation plays a pivotal role in enhancing your home's energy efficiency. During the winter months, insulation helps keep warm air generated by your heating system inside your home, preventing it from escaping through the roof. Conversely, in the summer, it blocks the hot sun's rays from overheating your attic and, subsequently, your living spaces. This regulation of indoor temperature means your HVAC system doesn't have to work overtime, leading to noticeable reductions in your energy bills.

Comfort Throughout the Year

Beyond the savings, the comfort level in your home significantly improves with proper attic insulation. Imagine a home that remains cozy in the winter and cool in the summer, without any unpleasant drafts or hot spots. This is the direct result of effective attic insulation, which creates a barrier against the outdoor temperature extremes.

Preventing Moisture Problems

Moisture can be a home's worst enemy, leading to mold, mildew, and even structural damage over time. A well-insulated attic acts as a shield against moisture penetration by maintaining a stable temperature and reducing the likelihood of condensation. This not only protects your home's structure but also ensures a healthier living environment.

Choosing the Right Insulation

When it comes to selecting attic insulation, the options can seem endless: fiberglass, cellulose, spray foam, and more. Each type has its benefits and ideal applications. 

Fiberglass: is popular for its ease of installation and cost-effectiveness. Cellulose: made from recycled paper, is as i believe the most eco-friendly choice that provides excellent thermal performance. 

Spray foam: although pricier, offers superior air sealing and moisture resistance.

The key is to consider your home's specific needs, climate, and budget. Often, a combination of insulation types yields the best results, especially in attics with irregular shapes or hard-to-reach areas.

Practical Tips for Homeowners

  • Conduct an Energy Audit: To understand your attic's current insulation status, consider hiring a professional to conduct an energy audit. This will pinpoint areas of energy loss and recommend improvements.
  • Seal Air Leaks: Before adding new insulation, seal any air leaks in the attic. This step is crucial for maximizing the efficiency of your insulation.
  • Consider the R-Value: The R-value measures insulation's resistance to heat flow. The higher the R-value, the better the insulation's effectiveness. Be sure to choose a product that meets or exceeds your region's recommended R-value for optimal performance.
  • Don't Overlook Ventilation: Proper attic ventilation is essential to prevent moisture accumulation therefore extending the life of your insulation. Ensure that your insulation does not block soffit vents.

Key Takeaways

  1. Attic insulation is crucial for maintaining comfortable indoor temperatures, reducing energy bills, and preventing moisture-related issues.
  2. Choosing the right type of insulation and proper installation are key to maximizing benefits.
  3. Combining insulation with air sealing and adequate ventilation can significantly enhance your home's energy efficiency.

Conclusion

To circle back to our initial question, how important is attic insulation? The answer is clear: it's an essential component of a well-maintained, efficient, and comfortable home. Investing in high-quality attic insulation not only pays off in terms of incresed confort and reduced energy costs but also contributes to the longevity and value of your property.

If you're considering attic insulation removal and replacement or simply wish to upgrade your current setup, remember that professional guidance is highly recommended it can make all the difference. Choosing the right materials, ensuring proper installation, and addressing any existing issues like air leaks or inadequate ventilation are steps best handled by experts.

Disclaimer:

This blog post is for informational purposes only and does not constitute professional advice. Each home is unique, and insulation needs can vary. For personalized recommendations and solutions, please contact our team. We specialize in attic insulation removal and replacement and are here to help you achieve an energy-efficient, comfortable home.

Looking for more information or ready to improve your attic insulation? Call us today!

How Many Inches Of Insulation Should Be In An Attic?

How Many Inches Of Insulation Should Be In An Attic?

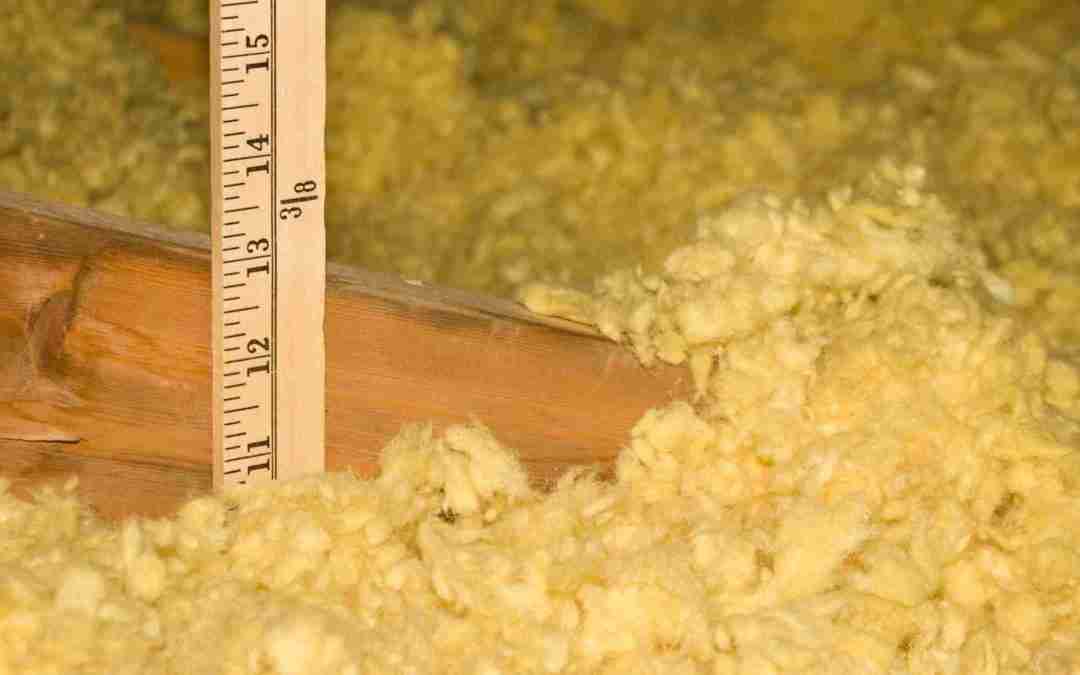
Measuring attic blown in insulation.

How Many Inches Of Insulation Should Be In An Attic? The Ideal Attic Insulation Depth

As a leading attic insulation removal and replacement company, we often encounter homeowners puzzled about the ideal amount of insulation for their attic. It's a critical component to ensure your home is energy-efficient, comfortable, and safe. So, let's dive deep into understanding how many inches of insulation should be in an attic to keep your home cozy and your energy bills in check.

Understanding Attic Insulation

Before we discuss the specifics, it's crucial to understand that insulation is measured in R-values. This measurement indicates the insulation's ability to resist heat flow. The higher the R-value, the better the insulation's effectiveness. For attic spaces, the recommended R-value varies depending on your geographic location in the United States.

Ideal Insulation Thickness

The Department of Energy (DOE) has provided guidelines for insulation based on zones:

  • Zones 1 & 2 (hot climates): It's recommended to have an R-value of R30 to R49, which translates to about 10 to 16 inches of fiberglass or cellulose insulation.
  • Zones 3 & 4 (moderate climates): The suggestion is to aim for an R-value between R38 to R60, equating to roughly 12 to 20 inches of insulation.
  • Zones 5 to 8 (cold climates): Here, the recommendation jumps to an R-value of R49 to R60+, which means you should have about 16 to 24 inches of insulation for optimal energy efficiency.

Key Takeaways for Homeowners:

  • The Right Amount is Crucial: Not having enough insulation can potentially lead to heat loss in the winter and excessive heat in the summer months, resulting in higher energy bills.
  • Check Local Recommendations: Always refer to the DOE's zone map for specific recommendations for your area.

Consider Material Types: The thickness needed can is based on the type of insulation material you choose (fiberglass, cellulose, foam, etc.).

Practical Tips for Evaluating Your Attic Insulation

  1. Conduct an Inspection: Begin by inspecting your current attic insulation. Measure its thickness with a ruler and check for any signs of damage or wear.
  2. Consult the Professionals: If you're unsure about your findings or the best course of action, consulting with a professional insulation company can provide clarity and direction.
  3. Think Long-Term: Upgrading your attic insulation is an investment in your home. While there may be upfront costs, the energy savings and improved comfort can be significant over time.

Enhancing Your Home's Energy Efficiency

Upgrading your attic's insulation is just one step in enhancing your home's overall energy efficiency. Other measures include sealing air leaks, ensuring proper ventilation, and maintaining your HVAC system. These efforts complement each other, leading to a more comfortable living environment and lower utility bills.

Conclusion

Determining how many inches of insulation should be in an attic is essential for maximizing your home's energy efficiency and comfort. By following the DOE's guidelines and considering the specific needs of your geographic location, you can make informed decisions about upgrading your attic insulation. Remember, the right amount of insulation can make a big difference in your home's energy consumption and the overall comfort of your home.

Disclaimer: This blog post is intended for informational purposes only. Specific recommendations can vary based on local climate conditions, building codes, and other factors. Always consult with a professional insulation company for tailored advice and solutions.

By taking the time to assess and upgrade your attic insulation, you're not only improving the quality of your living space but also contributing to a more energy-efficient and sustainable future.

How Much Does It Cost To Remove Attic Insulation?

How Much Does It Cost To Remove Attic Insulation?

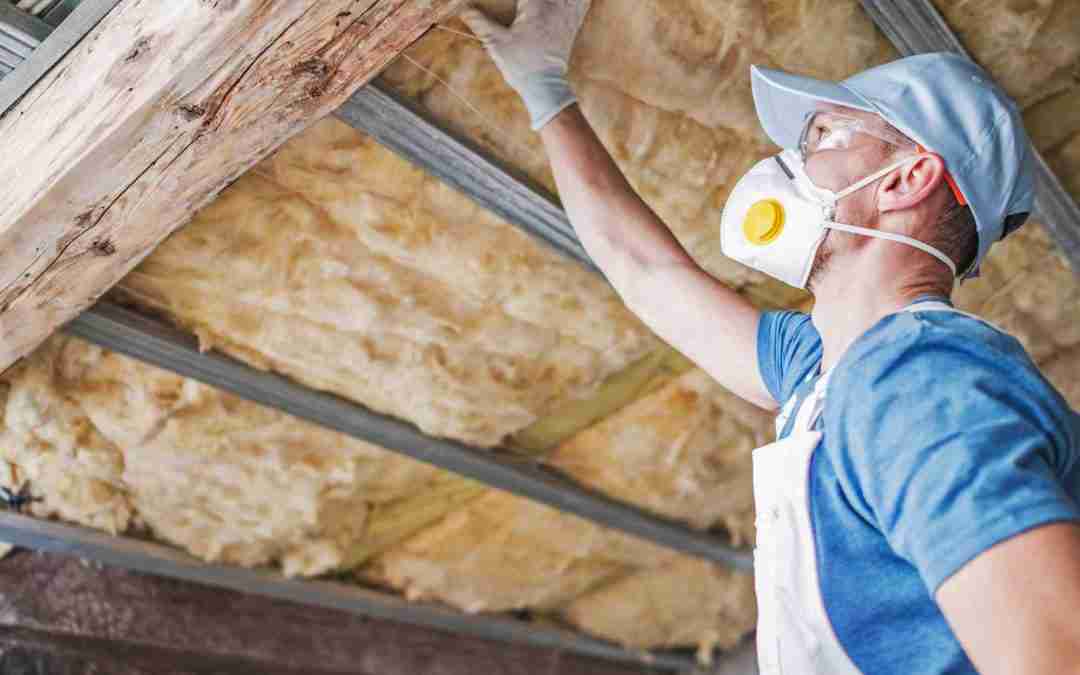
Man getting ready to remove attic insulation.

How Much Does It Cost To Remove Attic Insulation?

When considering home renovations or improvements, one aspect that often goes unnoticed until it's absolutely necessary is attic insulation. As an attic insulation removal and replacement company, we understand the importance of maintaining a healthy, efficient, and safe living environment. Today, we're addressing a common question many homeowners have: How much does it cost to remove attic insulation?

Understanding Attic Insulation Removal Costs

The cost of removing attic insulation varies significantly across the United States, influenced by factors such as the type of insulation required, the size of your attic, the complexity of the job, and geographic location. It's crucial to approach this with a comprehensive understanding, as making informed decisions is key to managing your home maintenance budget effectively.

Key Factors Affecting Costs

  1. Type of Insulation: Different insulation materials require different removal methods. For example, batt insulation is easier and cheaper to remove than spray foam or blown-in insulation.
  2. Attic Size and Accessibility: Larger attics or those with limited access can increase labor costs due to the increased time and effort required.
  3. Contamination: If your insulation is contaminated with mold, pests, or asbestos, specialized removal processes are necessary, which can escalate the costs.
  4. Geographic Location: Labor and disposal fees vary by location, affecting the overall cost.

Average Cost Breakdown

To give you a ballpark figure, attic insulation removal costs can range from $1 to $2 per square foot. However, when dealing with hazardous materials like asbestos, prices can soar to $5 to $10 / sq. ft. due to the need for specialized safety measures and disposal procedures.

For a standard 1,500 square foot attic, the cost of removal could range between $1,500 to $3,000, with prices potentially increasing based on the factors mentioned above.

Why Remove Attic Insulation?

It might seem counterintuitive to remove insulation, but there are several good reasons to do so:

  • Efficiency Upgrade: Removing old, inefficient insulation to make way for more effective solutions can help reduce energy bills.
  • Damage Repair: Water damage, mold, or pest infestations can compromise insulation integrity, necessitating removal.
  • Health Concerns: Older insulation materials may contain harmful substances like asbestos, posing health risks.

Key Takeaways for Homeowners

  • The cost of removing attic insulation varies widely based on several factors, including the type of insulation, attic size and accessibility, potential contamination, and geographic location.
  • It's essential to get multiple quotes from reputable companies to ensure you're getting a fair and accurate estimate for your specific situation.
  • Consider the long-term benefits of removing and replacing your attic insulation, such as improved energy efficiency, better indoor air quality, and enhanced comfort.

Practical Tips

When planning for attic insulation removal, here are a few practical tips to keep in mind:

  1. Assess the Condition: Regularly inspect your attic to understand the condition of your insulation and identify any potential issues early on.
  2. Seek Professional Advice: Consult with a professional insulation company to get an accurate assessment and quote. They can also advise on the best type of insulation for your needs.
  3. Factor in the Long-term Savings: While the upfront cost might seem high, consider the long-term savings in energy bills and the potential increase in your home’s value.
  4. Ensure Proper Disposal: Make sure the company you hire follows local regulations for insulation disposal, especially if dealing with hazardous materials.

Conclusion

While the cost to remove attic insulation can vary greatly, understanding the factors that influence pricing can help you budget more effectively. Remember, this investment not only improves your home's energy efficiency but also its safety and comfort. Always work with reputable professionals who can provide detailed estimates and advice tailored to your specific needs.

Disclaimer: This blog post is for informational purposes only and does not constitute professional advice. Prices and conditions may vary based on your location and the specifics of your project. Always consult with a professional for the most accurate information and guidance.

By approaching attic insulation removal with the right knowledge and professional support, you can ensure a successful and cost-effective project that enhances your home for years to come.

How To Remove Wet Insulation From Attic?

How To Remove Wet Insulation From Attic?

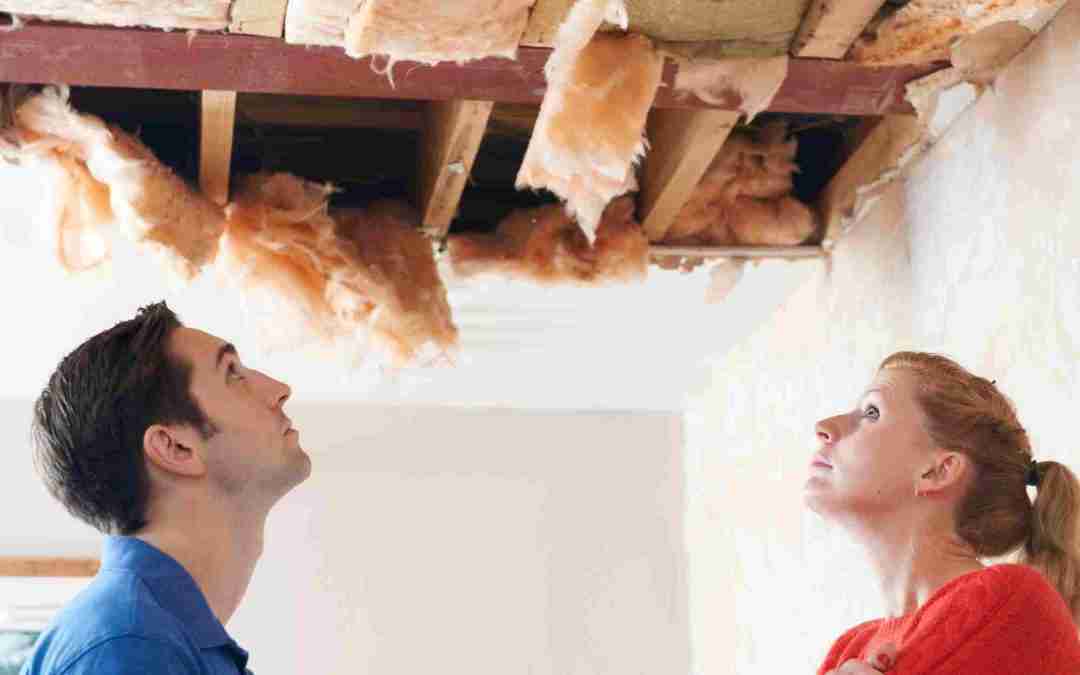
Couple looking at wet Insulation coming through broken ceiling from attic.

How To Remove Wet Insulation From Attic?

Discovering wet insulation in your attic can be a daunting revelation for any homeowner. Not only does it compromise the energy efficiency of your home, but it also poses significant health risks due to potential mold growth. As an attic insulation removal and replacement company, we recognize the critical significance of promptly and effectively resolving this issue. In this guide, we'll walk you through the steps to safely remove wet insulation from your attic, ensuring your home regains its comfort and safety.

As a specialized firm dedicated to the removal and replacement of attic insulation, we recognize the critical significance of promptly and effectively resolving this issue.

Key Takeaways:

  • Safety First: Always make sure you wear the right protective gear like face masks, safety glasses, gloves, etc. when handling wet insulation.
  • Proper Ventilation is Crucial: Ensure the attic is well-ventilated during the removal process.
  • Identify and Fix the Source of Moisture: Prior to replacing insulation, locate and repair the cause of water intrusion.

Understanding the Risks of Wet Insulation

Wet insulation loses its effectiveness, leading to higher energy bills and discomfort within your home. More critically, it can become a breeding ground for mold and mildew, which have the posibility to pose serious health risks to you and your family. Therefore, it's vital to tackle this issue head-on.

Step-by-Step Guide to Removing Wet Insulation

  1. Wear Protective Gear: Before you begin, equip yourself with the right gloves, mask, and protective eyewear. Do your research and buy the appropriate gear for the job, Wet insulation, especially fiberglass, can irritate your skin and respiratory system.
  2. Ensure Proper Ventilation: Open any windows or use fans to ventilate the attic. This not only makes the working environment safer but also aids in drying out any lingering moisture.
  3. Remove the Wet Insulation: Start by gently pulling the wet insulation away from the attic floor or walls. For batt insulation, roll it up carefully to contain any mold spores. If you're dealing with blown-in insulation, use a vacuum designed for insulation removal. Bag the wet insulation immediately to prevent the spread of mold or dust throughout your home.
  4. Dry the Area: Once the wet insulation is removed, focus on drying out the attic. Use fans and dehumidifiers to accelerate the process. This step is crucial to prevent further moisture damage and mold growth.
  5. Inspect for Mold: With the insulation removed, inspect the attic for any signs of mold. If you discover mold growth, it may be best to consult a professional to ensure it's properly remediated.
  6. Repair the Source of Moisture: This is perhaps the most critical step. Investigate the cause of the wet insulation—be it a roof leak, poor ventilation, or condensation issues—and make the necessary repairs. Failing to address the root cause will only lead to recurring problems.
  7. Consider Replacement Options: Once the attic is dry and the moisture issue resolved, it’s time to think about replacing the insulation. Explore options that are best suited for your home's needs and climate, focusing on materials with high resistance to moisture.

Practical Tips for a Successful Removal

  • Be Methodical: Work in sections to ensure thorough removal and drying. It's easier to track your progress and ensures no wet insulation is overlooked.
  • Document the Process: Taking before and after photos can be helpful, especially if you need to file an insurance claim.
  • Consult Professionals When in Doubt: If the project feels overwhelming, or if mold is present, don't hesitate to call in professional insulation removers or mold remediation specialists.

Conclusion

Removing wet insulation from your attic is not just about protecting your home’s structural integrity—it's about safeguarding your family's health and comfort. By following these few steps, you could effectively address the issue, preventing long-term damage and ensuring your home remains a safe, comfortable haven. Remember, the key to accomplishing successful project is not just removing the wet insulation but also addressing the underlying cause of the moisture. With a proactive approach, you can enhance your home's energy efficiency and indoor air quality for years to come.

Disclaimer: This blog post is for informational purposes only and is not intended as professional advice. The process of removing wet insulation from an attic can vary depending on the specific circumstances of your home, including the type of insulation and the extent of water damage. We recommend consulting with a professional insulation removal and replacement company to ensure the work is done safely and effectively. Always wear appropriate protective gear and take precautions to protect your health and safety.